Good placement, quiet room, and simple EQ will make your microphone sound much better.
I’ve mixed hundreds of voice tracks and coached podcasters on how to make your microphone sound better. This guide gives clear steps you can use today, from quick fixes to deeper upgrades. Read on to learn practical tips, real mistakes I made, and the exact settings that helped voices sound warm and clear.

Why your microphone may sound bad
Many things can make a mic sound thin, noisy, or boxy. Room noise, poor placement, wrong settings, or a cheap cable all change the tone. Electronic noise from interfaces or USB hubs also hurts sound. Understanding the cause helps you fix it fast.
Common causes:
- Room reflections that add echo and muddiness.
- Background noise like fans or traffic.
- Mic too far or off-axis from the mouth.
- Wrong gain setting is causing hiss or clipping.
- Low-quality cable or bad USB hub.

Source: youtube.com
Quick hardware fixes to make your microphone sound better
Start with easy steps you can apply in minutes. These often solve most problems without a new gear.
Fast checks and fixes:
- Move the mic closer. Aim for 4–12 inches for clear speech.
- Adjust gain. Set input so peaks are below clipping by 6–10 dB.
- Use a pop filter to reduce plosives like P and B.
- Swap cables. A faulty cable can add noise or drop highs.
- Avoid USB hubs. Plug directly into the computer when possible.
Personal note: I once mixed a pod and fixed a hiss by simply moving the mic 6 inches closer and lowering the gain. The improvement was obvious.
Source: headphonesty.com
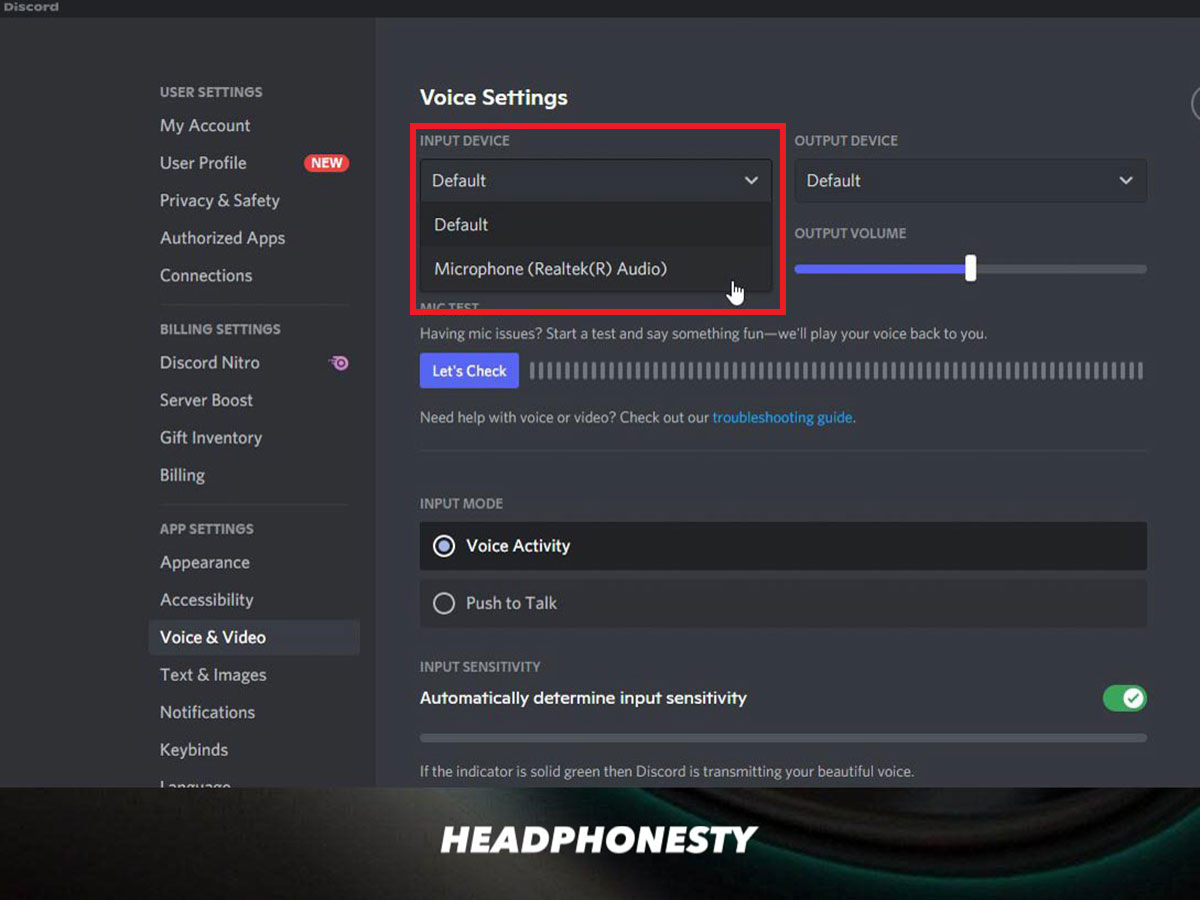
Software and settings to improve mic sound
Software can clean and shape sound quickly. Learn which tools to use and how to set them.
Key settings:
- Input level: Keep average loudness around -18 to -12 dBFS and peaks below -6 dBFS.
- Sample rate and bit depth: Use 48 kHz and 24-bit for voice. It gives headroom and clearer sound.
- Noise reduction: Use a light noise gate or spectral noise removal. Avoid heavy cleanup that sounds waxy.
- Low-cut filter: Roll off below 80 Hz to remove rumble from AC or handling noise.
- Monitoring: Use low-latency monitoring to hear changes live.
Practical tip: Record a short test, tweak one setting at a time, and listen on headphones. Small changes add up.

Source: gosensic.com
Room treatment and mic placement
The room matters more than people expect. Treating reflections will make your microphone sound better than most upgrades.
Simple room fixes:
- Move away from hard walls. Aim to sit in the room’s center area.
- Add soft items: rugs, curtains, couch cushions, to reduce reflections.
- Use a portable vocal shield behind the mic to cut early reflections.
- Angle the mic slightly off-axis from your mouth to reduce plosives.
- Place the mic at mouth level or slightly below for a natural tone.
Real experience: I recorded in a small bedroom with a duvet hung behind the mic. The voice lost its echo and sounded warmer. It cost almost nothing.

Source: youtube.com
Recording techniques and processing to improve tone
How you record and process affects quality. Use these steps for clear voice tracks.
Recording tips:
- Speak toward the mic and keep a consistent distance.
- Control room noise during quiet parts by pausing noisy devices.
- Use short takes and label files to speed editing.
Basic processing chain:
- High-pass filter at 60–100 Hz to remove rumble.
- Gentle EQ: cut 200–500 Hz if muddy; boost 3–6 kHz for presence.
- Light compression with a low ratio (2:1) to even levels.
- De-esser to tame harsh S sounds.
- Final limiter to raise perceived loudness without clipping.
Example settings: For many voices, try EQ cut 250 Hz -2 to -4 dB, boost 4 kHz +2 to +4 dB, compressor attack 10–30 ms, release 60–120 ms. Tweak by ear.

Source: gosensic.com
Budget gear upgrades that give the biggest gains
You don’t need the most expensive mic to get great sound. Target upgrades that matter.
Best upgrades by impact:
- Better mic: moving from a laptop mic to a dynamic or condenser gives big gains.
- Audio interface or preamp: clean gain and better converters matter more than mic price often.
- XLR cable: A solid balanced cable reduces noise.
- Pop filter and stand: stable mic placement reduces handling noise.
- Headphones for monitoring: closed-back cans keep bleed out of the mic.
I once swapped a cheap USB mic for an entry-level XLR mic plus a used interface. The voice became fuller and cleaner. The cost was under $200.

Source: youtube.com
Advanced tips for pros
For podcasters and voice talent who want a polished sound, add these pro tricks.
Pro techniques:
- Use a dynamic mic in noisy rooms; it rejects room sound better.
- Record a room tone track for cleaner edits and noise reduction.
- Use multiband compression for tight control on complex voices.
- Create a template chain for consistency across sessions.
- Test on different speakers and earbuds to ensure translation.
Be honest about limits. A treated room and good technique beat a chain of heavy plugins. Trust your ears.
Source: flixier.com
Frequently Asked Questions of how to make your microphone sound better
How close should I be to my microphone?
Keep your mouth 4–12 inches from the mic. Closer gives warmth and less room sound; too close causes plosives and bass build-up.
Should I use a condenser or a dynamic mic for voice?
Use a condenser for studio vocals and breath detail. Use a dynamic in untreated or noisy rooms for better rejection and warmth.
How do I set the microphone gain correctly?
Set gain so normal speech averages -18 to -12 dBFS, and peaks do not exceed -6 dBFS. Avoid both low gain (noise) and clipping.
Will EQ fix a bad-sounding room?
EQ can help, but cannot remove echo or strong reflections. Treat the room first, then use EQ to polish tone.
Is software noise reduction safe to use?
Yes, when used lightly. Remove a short noise profile and apply conservative settings to avoid artifacts.
Conclusion
You can make your microphone sound better with simple fixes and smart choices. Focus on placement, room control, proper gain, and light processing first. Upgrade gear only after you solve the basics for the best value.
Try one change at a time. Test with real recordings and listen on multiple devices. If this guide helped, leave a comment, subscribe for more tips, or try the steps now and share your results.