
Looking to boost your home security with a Ring Wired Doorbell? You’re in the right place.
Installing this smart device might seem tricky, but with the right steps, you can do it yourself quickly and safely. Imagine seeing who’s at your door from your phone anytime, anywhere. In this guide, you’ll learn exactly how to install Ring Wired Doorbell without any hassle.
Keep reading, and by the end, you’ll have your new doorbell up and running, giving you peace of mind and full control over your front door. Let’s get started!
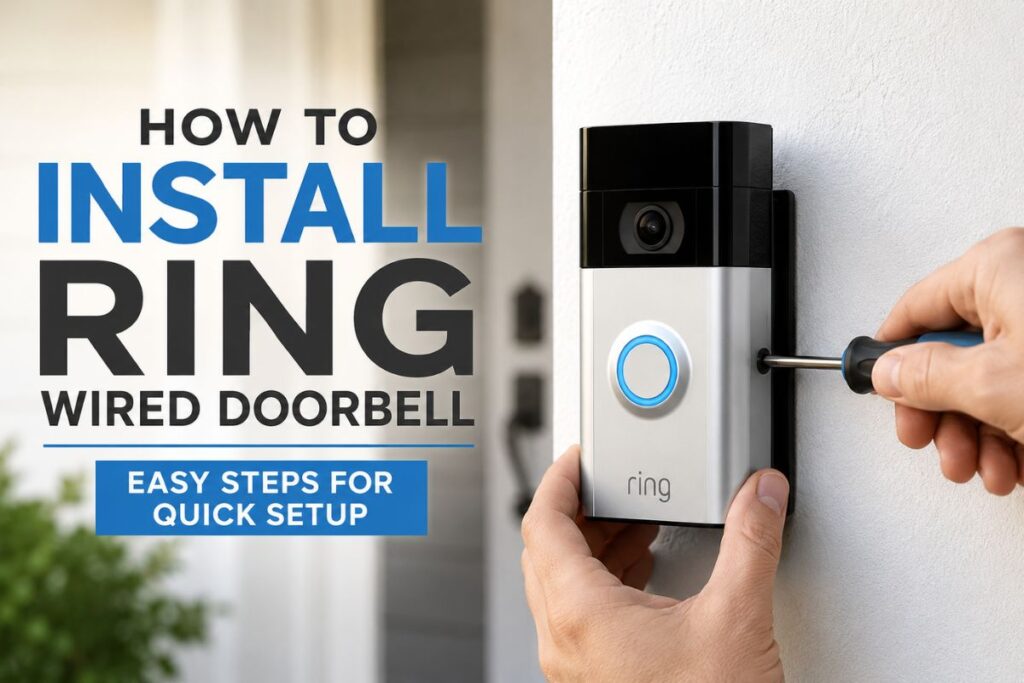
Tools And Materials Needed
Installing a Ring Wired Doorbell requires certain tools and materials. These help ensure a smooth and safe setup. Having everything ready saves time and effort.
The tools and materials listed below are easy to find. Most are common household items. Some come with the doorbell package itself.
Basic Tools
A screwdriver is essential for removing and securing screws. A drill may be needed to make holes in walls. Use a level to keep the doorbell straight.
Electrical Supplies
Wire strippers help prepare the existing doorbell wires. Electrical tape secures wire connections safely. A voltage tester checks if the wires have power.
Mounting Materials
The doorbell mounting bracket usually comes with the kit. Use anchors or screws to attach it firmly. A pencil or marker helps mark drill points.
Safety Equipment
Wear gloves to protect your hands during installation. Safety glasses keep your eyes safe from debris. Turn off power at the breaker to avoid shocks.
Check Your Existing Doorbell Setup
Before installing your Ring Wired Doorbell, check your current doorbell setup. This step helps you know if your wiring and power supply fit the new device. It also prevents problems during installation. Knowing your existing setup makes the process smoother and safer. It ensures your new doorbell will work properly and last longer.
Locate Your Doorbell Transformer
Find the transformer that powers your doorbell. It usually sits near your main electrical panel or inside a utility closet. The transformer changes high voltage to low voltage for your doorbell. Check the label for voltage rating. Ring Wired Doorbell needs a transformer with 16-24 volts AC.
Inspect Your Doorbell Wiring
Look at the wires connected to your doorbell button and chime. Most homes have two wires. These should be in good condition without breaks or corrosion. Make sure the wires are copper or copper-coated. This helps ensure a good connection to the new doorbell.
Confirm Your Doorbell Chime Compatibility
Check your existing doorbell chime. It must support mechanical or digital chimes that work with Ring Wired Doorbell. Some old chimes may not work properly. Test the chime by pressing your doorbell button. Listen for clear sound without buzzing or distortion.
Turn Off Power Safely
Turning off the power safely is the first step before installing the Ring Wired Doorbell. This step protects you from electrical shock. It also prevents damage to your doorbell and wiring. Take your time and follow safety rules closely. Even a small mistake can cause injury or damage.
Locate Your Home’s Circuit Breaker
Find the main circuit breaker box in your home. It is usually in the basement, garage, or utility room. The box holds switches that control electricity flow. Look for the breaker switch that controls power to your doorbell area. It might be labeled “doorbell,” “front door,” or “chime.”
Switch Off The Correct Breaker
Flip the breaker switch to the off position. This cuts power to your doorbell wiring. You will no longer have electricity in that circuit. Double-check by pressing the doorbell button to see if the chime works. No sound means power is off.
Use A Voltage Tester
Test the wires with a voltage tester or multimeter. Touch the tester to the wires where you will work. It confirms no electricity runs through them. Always test before touching wires. It ensures your safety during installation.
Wear Safety Gear
Wear insulated gloves to protect your hands. Use safety glasses to shield your eyes. These items reduce the risk of injury from sparks or debris. Good safety gear helps you stay secure while working with electricity.
Credit: www.siatki-sita.pl
Remove Old Doorbell
Removing your old doorbell is the first step to install the Ring Wired Doorbell. This task is simple and requires basic tools. It ensures a clean start for your new smart doorbell installation. Before you start, turn off power at the breaker. This prevents electric shock while you work.
Turn Off The Power
Locate your home’s circuit breaker panel. Find the switch for the doorbell circuit. Flip the switch to the off position. Use a voltage tester to confirm no power is present.
Remove The Doorbell Cover
Most doorbells have a cover that protects the wiring. Use a screwdriver to loosen the screws. Carefully remove the cover and set it aside.
Disconnect The Wires
Note how the wires connect to the doorbell. Unscrew the terminals holding the wires. Gently pull the wires away from the old doorbell. Avoid damaging the wires.
Remove The Old Doorbell Base
The base is usually attached with screws. Use a screwdriver to remove these screws. Take the base off the wall. Clean the area for your new installation.
Prepare The Mounting Area
Clear the wall surface where the doorbell will go. Make sure the area is dry and flat for easy mounting. Check that the wiring is ready and safe to connect.
Clear The Installation Spot
Start by choosing a flat surface near your front door. Remove dirt, dust, and old screws. A clean area helps the doorbell stick well and work properly. Use a damp cloth to wipe the surface. Let it dry fully before moving on.
Check For Power Wires
Locate the existing doorbell wires behind the wall or doorframe. Turn off the power at the circuit breaker first. Use a voltage tester to ensure no electricity flows. Identify the wires to connect the Ring Wired Doorbell safely.
Mark The Mounting Holes
Hold the mounting bracket against the wall. Use a pencil to mark the screw holes. Check the marks twice. Accurate marks make drilling easier and prevent damage to the wall.
Drill Pilot Holes
Choose a drill bit that fits your wall type. Drill small holes at the pencil marks. Pilot holes guide screws and prevent cracking. Clean dust from the holes after drilling.
Connect The Wires
Connecting the wires is a key step in installing your Ring Wired Doorbell. This step links the doorbell to your home’s power supply. Proper wiring ensures your device works smoothly and stays powered.
Take your time to connect the wires carefully. Incorrect wiring can cause problems or damage the device. Follow these simple steps to make sure your doorbell is wired correctly.
Turn Off Power At The Circuit Breaker
Safety first. Switch off the power to your doorbell’s circuit at the breaker box. This prevents electric shock and protects your device. Use a tester to check the wires are not live before touching them.
Identify The Doorbell Wires
Locate the two wires from your existing doorbell. They are usually thin and copper-colored. If unsure, use a voltage tester to confirm they carry power. Label the wires to avoid confusion during connection.
Connect The Wires To The Ring Doorbell
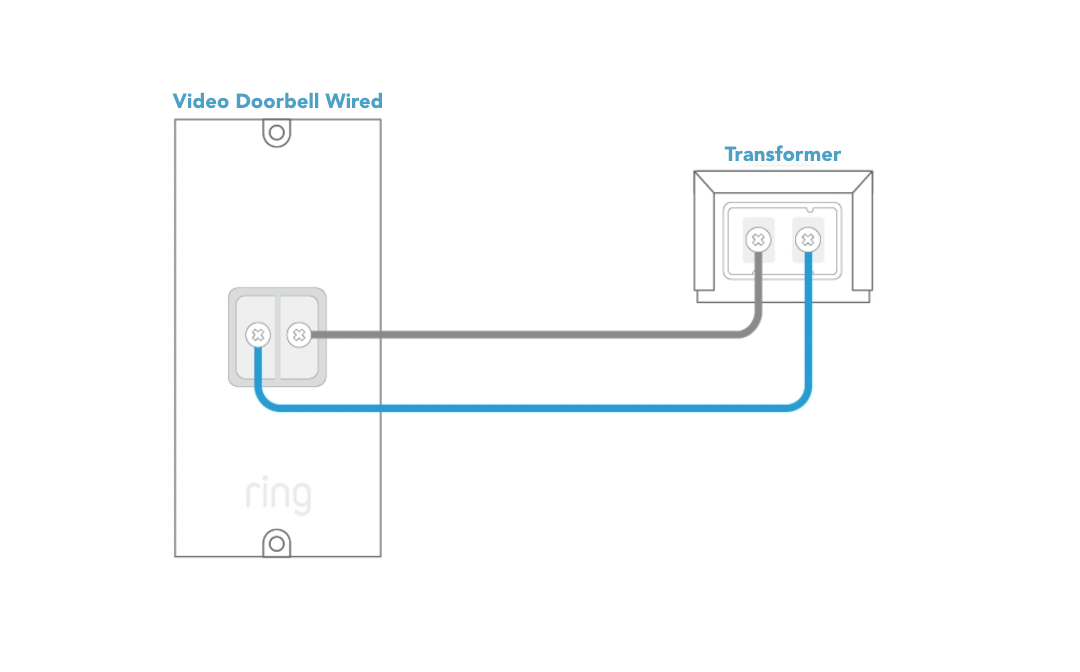
Attach the two wires to the screws on the back of the Ring Doorbell. It does not matter which wire goes to which screw. Secure the wires firmly under the screws to ensure a good connection.
Secure The Doorbell To The Wall
Once wired, place the doorbell against the mounting bracket. Use the provided screws to fix it tightly to the wall. Check the wires stay connected and are not pinched or loose.
Attach The Ring Doorbell
Attaching the Ring Wired Doorbell is a simple but important step. It makes sure your doorbell stays secure and works well. Follow each step carefully for the best results.
Prepare The Mounting Bracket
Start by taking the mounting bracket from the box. Hold it against the wall where you want to place the doorbell. Use a pencil to mark the holes for screws. This helps you drill in the right spots.
Secure The Bracket To The Wall
Next, drill holes at the marked points. Use anchors if you are fixing it on drywall. Screw the mounting bracket firmly to the wall. Check if it feels tight and does not wobble.
Connect The Doorbell Wires
Now, take the wires from your doorbell system. Attach each wire to the screws on the back of the Ring doorbell. Make sure the wires are tight and secure. Loose wires can cause problems.
Attach The Ring Doorbell To The Bracket
Align the doorbell with the mounting bracket. Push it gently until it clicks into place. Use the included screws to lock the doorbell onto the bracket. This keeps the doorbell safe from theft.
Restore Power And Test
After installing your Ring Wired Doorbell, restoring power is a key step. Power must return to the doorbell to make it work properly. Testing ensures the device functions as expected.
Restoring power is quick and safe. Testing helps you confirm that everything is connected right. Let’s look at how to restore power and test your new doorbell.
Turn The Circuit Breaker Back On
Locate the circuit breaker you turned off during installation. Flip the switch to the “on” position. This action restores electrical power to your doorbell. Wait a few seconds for the system to restart. The doorbell may light up or make a sound. These signs show power is back.
Check The Doorbell’s Functionality
Press the doorbell button once. Listen for the chime inside your home. The chime confirms the button works correctly. Open the Ring app on your phone. Check for a live video feed from the doorbell. The app should show a clear image.
Test The Motion Sensor
Walk past your doorbell to trigger the motion sensor. Watch the app for alerts. The sensor should detect movement and send notifications. Make sure notifications arrive promptly on your phone. This step ensures your doorbell keeps you informed.
Set Up The Ring App
Setting up the Ring app is the next step after installing your wired doorbell. The app lets you control and monitor your doorbell from anywhere. It sends alerts and lets you see visitors in real time. The setup is quick and easy to follow.
Download The Ring App
Go to the App Store or Google Play Store. Search for “Ring” and download the app. It works on both iOS and Android devices. Make sure your phone has a strong internet connection.
Create A Ring Account
Open the app and tap “Create Account.” Enter your email address and create a secure password. You will need this account to access your doorbell remotely. Follow the prompts to verify your email.
Add Your Ring Wired Doorbell
Tap the “+” icon in the app to add a new device. Select “Doorbells” and then choose your Ring wired doorbell model. The app will guide you through the connection process step-by-step.
Connect To Wi-fi
Select your home Wi-Fi network in the app. Enter your Wi-Fi password carefully. The doorbell needs a strong Wi-Fi signal to work properly. Wait for the app to confirm the connection.

Credit: www.youtube.com
Adjust Settings For Optimal Performance
After installing your Ring Wired Doorbell, adjusting its settings improves how it works. Custom settings help the doorbell fit your needs. Small changes can boost video clarity and alert accuracy.
Spend a few minutes in the Ring app to get the best results. Adjusting settings ensures you do not miss any visitors or alerts. It also saves battery and reduces false alarms.
Configure Motion Zones
Open the Ring app and find the motion settings. Create motion zones to focus on specific areas. This stops alerts from cars or people passing far away. Adjust zones to cover your walkway and porch only.
Set Motion Sensitivity
Choose how sensitive the doorbell is to motion. High sensitivity catches small movements but may cause false alerts. Low sensitivity reduces false alerts but may miss some visitors. Test different levels to find what works best for you.
Adjust Notification Preferences
Decide when and how you receive alerts on your phone. Turn on notifications for motion and rings. Use quiet hours to mute alerts during certain times. This keeps notifications useful and not annoying.
Optimize Video Quality
Check your Wi-Fi signal strength near the doorbell. Strong signal ensures clear video and smooth streaming. Lower video quality saves data but reduces clarity. Adjust video settings based on your internet speed.
Enable Night Vision
Night vision helps see visitors in the dark. Make sure this feature is on for 24/7 security. Test night vision by checking the live view in low light. Adjust settings if the image is too dark or bright.
Troubleshooting Common Issues
Troubleshooting common issues is key for a smooth Ring Wired Doorbell setup. Problems can block your doorbell from working right. Fixing these issues fast helps keep your home safe and connected. Below are simple solutions for frequent problems. Follow these tips step by step to fix your doorbell quickly.
Power Supply Problems
Check if the doorbell gets power from your home’s wiring. Use a voltage tester to see if power flows to the doorbell. If no power, check circuit breakers or fuses. Make sure wires connect tightly to the doorbell terminals. Loose wires cause no power issues.
Wi-fi Connection Issues
Confirm your Wi-Fi signal reaches the doorbell. Walls and distance weaken signals. Move your router closer or use a Wi-Fi extender. Restart your router to refresh the connection. Reconnect the doorbell to your Wi-Fi using the app.
App Syncing Errors
Update the Ring app to the latest version. Close and reopen the app to fix glitches. Log out and log back in to refresh your account. Check your phone’s internet connection. Sync issues often fix with these steps.
Doorbell Button Not Responding
Clean the button area to remove dirt or debris. Press the button firmly to test. Check wiring behind the doorbell for loose connections. Replace the button if it still does not work.
Chime Not Ringing
Ensure the chime is compatible with your Ring Wired Doorbell. Check wiring between the doorbell and chime. Adjust volume settings in the Ring app. Test the chime by pressing the doorbell button.
Frequently Asked Questions
What Tools Are Needed To Install Ring Wired Doorbell?
You need a screwdriver, drill, wire stripper, voltage tester, and level. These tools help ensure a safe and precise installation.
Can I Install Ring Wired Doorbell Myself?
Yes, you can install it yourself if you follow the instructions carefully. Basic electrical knowledge is helpful but not mandatory.
How Do I Connect Ring Wired Doorbell To Existing Wires?
Turn off power, connect the doorbell wires to your home’s doorbell wires, then secure connections. Restore power and test the device.
How Long Does Ring Wired Doorbell Installation Take?
Installation typically takes 20 to 40 minutes depending on your experience and wiring complexity.
Conclusion
Installing your Ring Wired Doorbell is a straightforward process. Follow the steps carefully and take your time. Make sure your power is off before you start. Double-check all connections to avoid issues later. Once installed, test the doorbell to ensure it works.
You can now enjoy better home security and convenience. The effort you put in will pay off with peace of mind. Ready for a safer home? This simple upgrade is worth it.