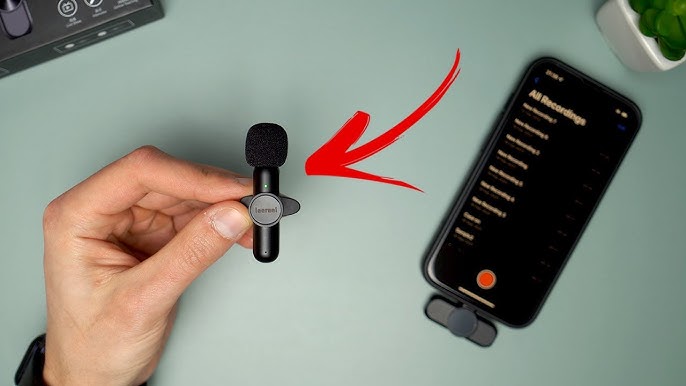
Start by powering the mic and receiver, pair them, set levels, and test audio before speaking.
I have guided bands, podcasters, and speakers on how to use wireless microphone systems for years. This guide shows clear steps, gear choices, setup tips, troubleshooting tricks, and care routines so you can use a wireless microphone with confidence. Read on for simple, tested advice that helps you sound great and avoid common mistakes.

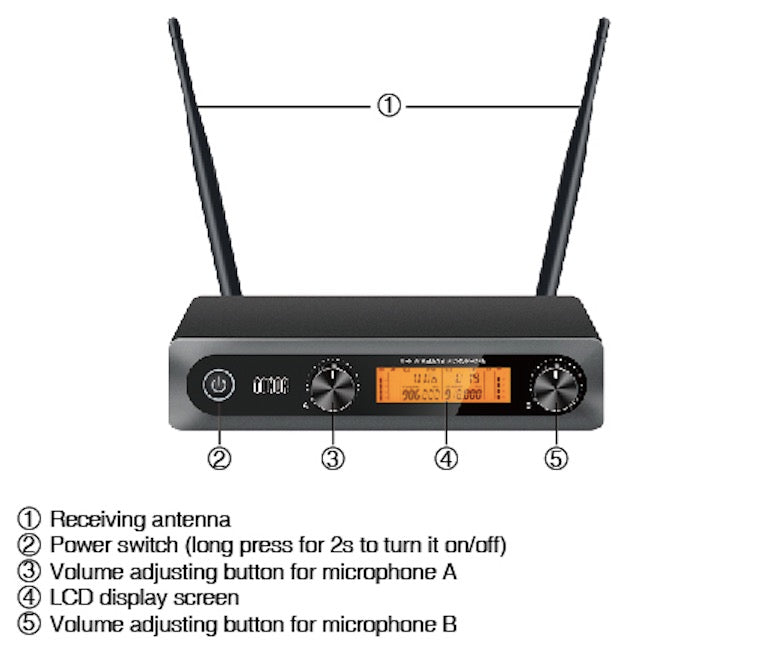
Understanding wireless microphones
A wireless microphone sends voice or instrument sound to a receiver without a cable. It uses a transmitter and a receiver. The transmitter can be a handheld mic, a lavalier clip-on, or a bodypack for headset mics. The receiver plugs into a sound system, mixer, or interface.
Why learn how to use wireless microphone well? Because a poor setup causes hiss, dropouts, or feedback. A good setup gives clear sound and freedom to move.
Basic terms to know:
- Transmitter: Sends audio over radio waves.
- Receiver: Picks up that radio signal and outputs audio.
- Frequency or channel: The radio band the system uses.
- Gain: The input level control on the receiver or mixer.
- Latency: Delay between speaking and hearing sound.
From my experience, learning these terms first makes setup faster and less stressful. I once fixed a stage show by switching to a clearer channel in five minutes. That saved the performance.

Source: youtube.com
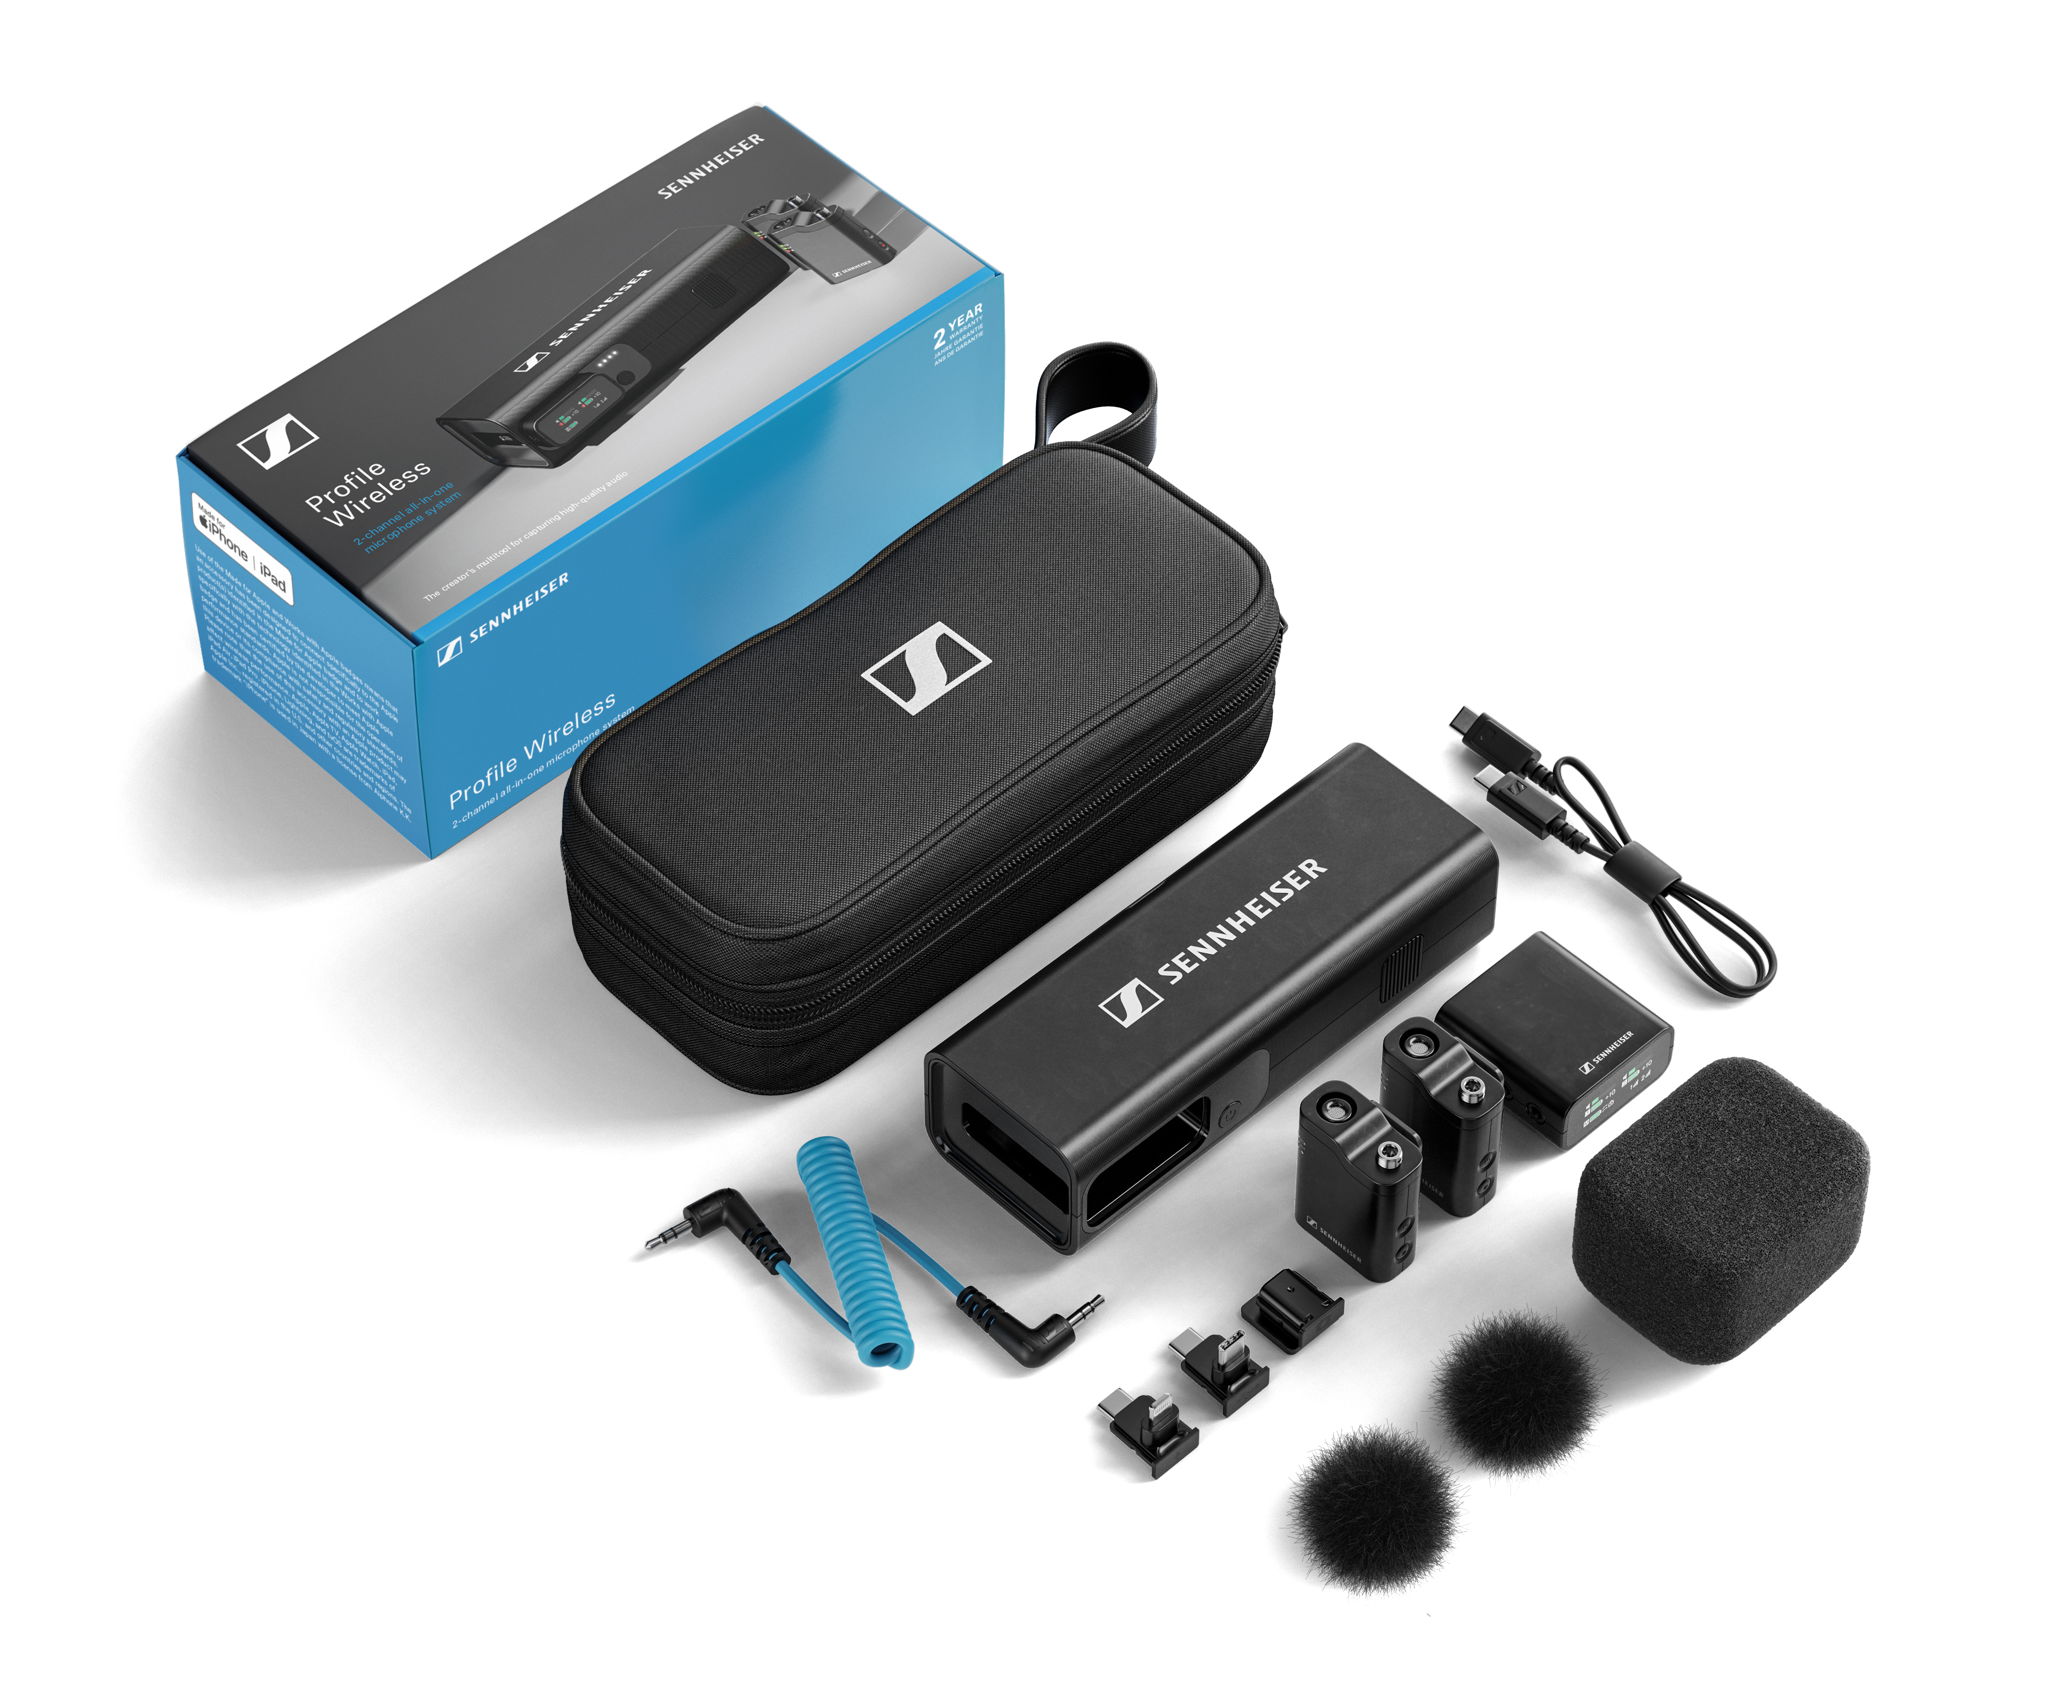
Choosing the right system
Pick a system that fits your needs and budget. Consider form factor, range, battery type, and channel count.
Key buying factors:
- Type: handheld, lavalier, or headset. Choose a handheld for singers, a lavalier for interviews, and a headset for presenters who need hands-free.
- Frequency band: UHF often works well in busy venues. Digital 2.4 GHz systems are compact but may clash with Wi‑Fi.
- Range: Check real-world range, not just specs. Walls and crowds cut the range.
- Channels: If you run multiple mics, get a multi-channel system or units that sync without interference.
- Power: Look at battery life and whether the pack uses AA or rechargeable cells.
Personal tip: I prefer systems with easy infrared (IR) sync. Sync cuts tune time and reduces human error. Spend a bit more for reliable RF performance if you do live shows.
Source: tonormic.com
Setting up step-by-step
- Inspect gear and batteries.
- Charge or insert fresh batteries.
- Check antennas on the receiver.
- Power devices in the correct order.
- Turn on the receiver first, then the transmitter.
- Set frequency or pair via IR.
- Use auto-scan on the receiver if available.
- Or manually pick a clear channel.
- Connect receiver output to the mixer or interface.
- Use balanced XLR for long runs to prevent noise.
- Use 1/4 inch TRS or unbalanced for a short run, and acceptable.
- Set gain and levels.
- With mic clipped or held as usual, speak at performance volume.
- Lower the receiver gain until there is no distortion.
- Raise mixer gain until a clean signal appears around -12 dB to -6 dB on meters.
- Check for interference.
- Walk the performance area while testing.
- Watch for audio dropouts or noise.
- Test lap and movement.
- Move through typical stage positions to ensure a steady signal.
A simple checklist I use before any show:
- Batteries checked
- Receiver synced
- Output routed and labeled
- Levels set and saved
- Spare batteries and cable ready

Source: youtube.com
Using a wireless microphone on stage or in presentations
Practice mic technique and mic placement. Hold the handheld mic 1–3 inches from the mouth. For lavaliers, place the mic on the chest or lapel, pointing up toward the mouth, and avoid rubbing against clothing.
Tips for live use:
- Avoid covering the mic head with hands or fingers.
- Keep the bodypack in a secure pocket or clip it to a belt.
- Use a windscreen outdoors to reduce wind noise.
- Mute the transmitter when not in use to prevent accidental noise.
- Label each transmitter and receiver pair to reduce confusion during quick swaps.
From personal gigs, I learned to run a soundcheck that mimics the real show. That reveals problems early. In one event, swapping pockets fixed a muffled lavalier sound instantly.
Source: sennheiser.com
Troubleshooting and common problems
Problem: Dropouts or fading audio.
- Cause: Interference, weak batteries, or blocked line of sight.
- Fix: Move transmitter or receiver, replace batteries, change frequency.
Problem: Hiss or static noise.
- Cause: Poor gain staging or unbalanced cables.
- Fix: Lower receiver gain, use balanced XLR, adjust mixer EQ.
Problem: Feedback or squeal.
- Cause: Mic too close to speakers or excessive gain.
- Fix: Move speakers, reduce mic gain, use a notch filter for the problem frequency.
Problem: Pairing fails.
- Cause: Mismatched bands or outdated firmware.
- Fix: Confirm band compatibility and update firmware if possible.
A quick routine I use before a show:
- Swap to fresh batteries if performance will exceed useful life.
- Run a frequency scan at the venue.
- Walk test all mic placements.
Source: youtube.com
Maintenance and care
Treat wireless gear like fragile tech. Clean and store properly to extend life.
Maintenance steps:
- Remove batteries after use to prevent leaks.
- Wipe mics with a dry cloth; use alcohol wipes for head grilles if needed.
- Store in a padded case to protect antennas and connectors.
- Replace windscreens that are torn or saturated.
- Schedule firmware checks yearly for digital systems.
I once avoided a dead mic by keeping spare packs charged. That simple habit prevented an onstage crisis.

Source: syncoaudio.com
Frequently Asked Questions of how to use wireless microphone
How do I pair a wireless microphone with a receiver?
Turn on the receiver, then the transmitter. Use the receiver’s auto-scan or IR sync to match frequency. Confirm audio appears on the receiver meter and do a quick sound check.
How far can a wireless microphone reach?
Range varies by system, band, and environment. Expect 100–300 feet in open space, but walls and crowd density reduce that significantly.
What batteries work best for wireless microphone transmitters?
High-quality alkaline or lithium batteries are reliable. Rechargeable NiMH or lithium-ion packs work well, but confirm the system supports them and monitor runtime.
Why does my wireless microphone buzz near Wi‑Fi or phones?
Buzz can come from RF interference from Wi‑Fi and phones. Change to a less crowded frequency, move the receiver, or use a system on a different band.
Can multiple wireless microphones be used together?
Yes, but they must use separate, non-overlapping channels. Scan the venue for clear frequencies and choose a multi-channel system if running many mics.
Conclusion
Using a wireless microphone well is about preparation, clear setup, and good habits. Learn basic terms, pick the right system, follow the setup steps, and test movement and levels. Keep spares, maintain gear, and do a soundcheck that mimics the real event.
Take action: practice these steps before your next event, label your gear, and keep a small kit of batteries and cables. If this guide helped, try one setup at home and leave a comment about your experience, or subscribe for deeper tips.