Use a dock or KVM switch, share your peripherals, and change monitor inputs.
If you need to know how to switch between desktop and laptop with monitors, you’re in the right place. I help teams build clean, fast desks that work with any device. In this guide, I’ll show simple steps and pro tips that work at home or in the office. You’ll learn the gear to buy, how to wire it, and what to avoid, with options for any budget. Read on to master how to switch between desktop and laptop with monitors without breaking your flow.
What you need to know before you start
Before you pick a method, map your needs. Note how many monitors you use, and what refresh rate you want. Check your ports on both machines and on your displays.
Also list your shared gear. That may be a keyboard, mouse, webcam, mic, headset, and Ethernet. Decide if you want one-cable docking for the laptop. Knowing this helps you pick the best way to switch between a desktop and a laptop with monitors.

The main ways to switch between a desktop and a laptop
There are five common paths. Each one can solve how to switch between desktop and laptop with monitors. Choose the one that fits your desk and budget.
Hardware KVM switch
A KVM switch shares your Keyboard, Video, and Mouse. It lets you press a button or hotkey to flip control. Good KVMs pass high resolution and high refresh rate without lag.
Look for true support for the modes you need. 4K 144 Hz or ultrawide 3440×1440 144 Hz needs enough bandwidth. Many budget KVMs top out at 4K 60 Hz, so check the spec sheet.
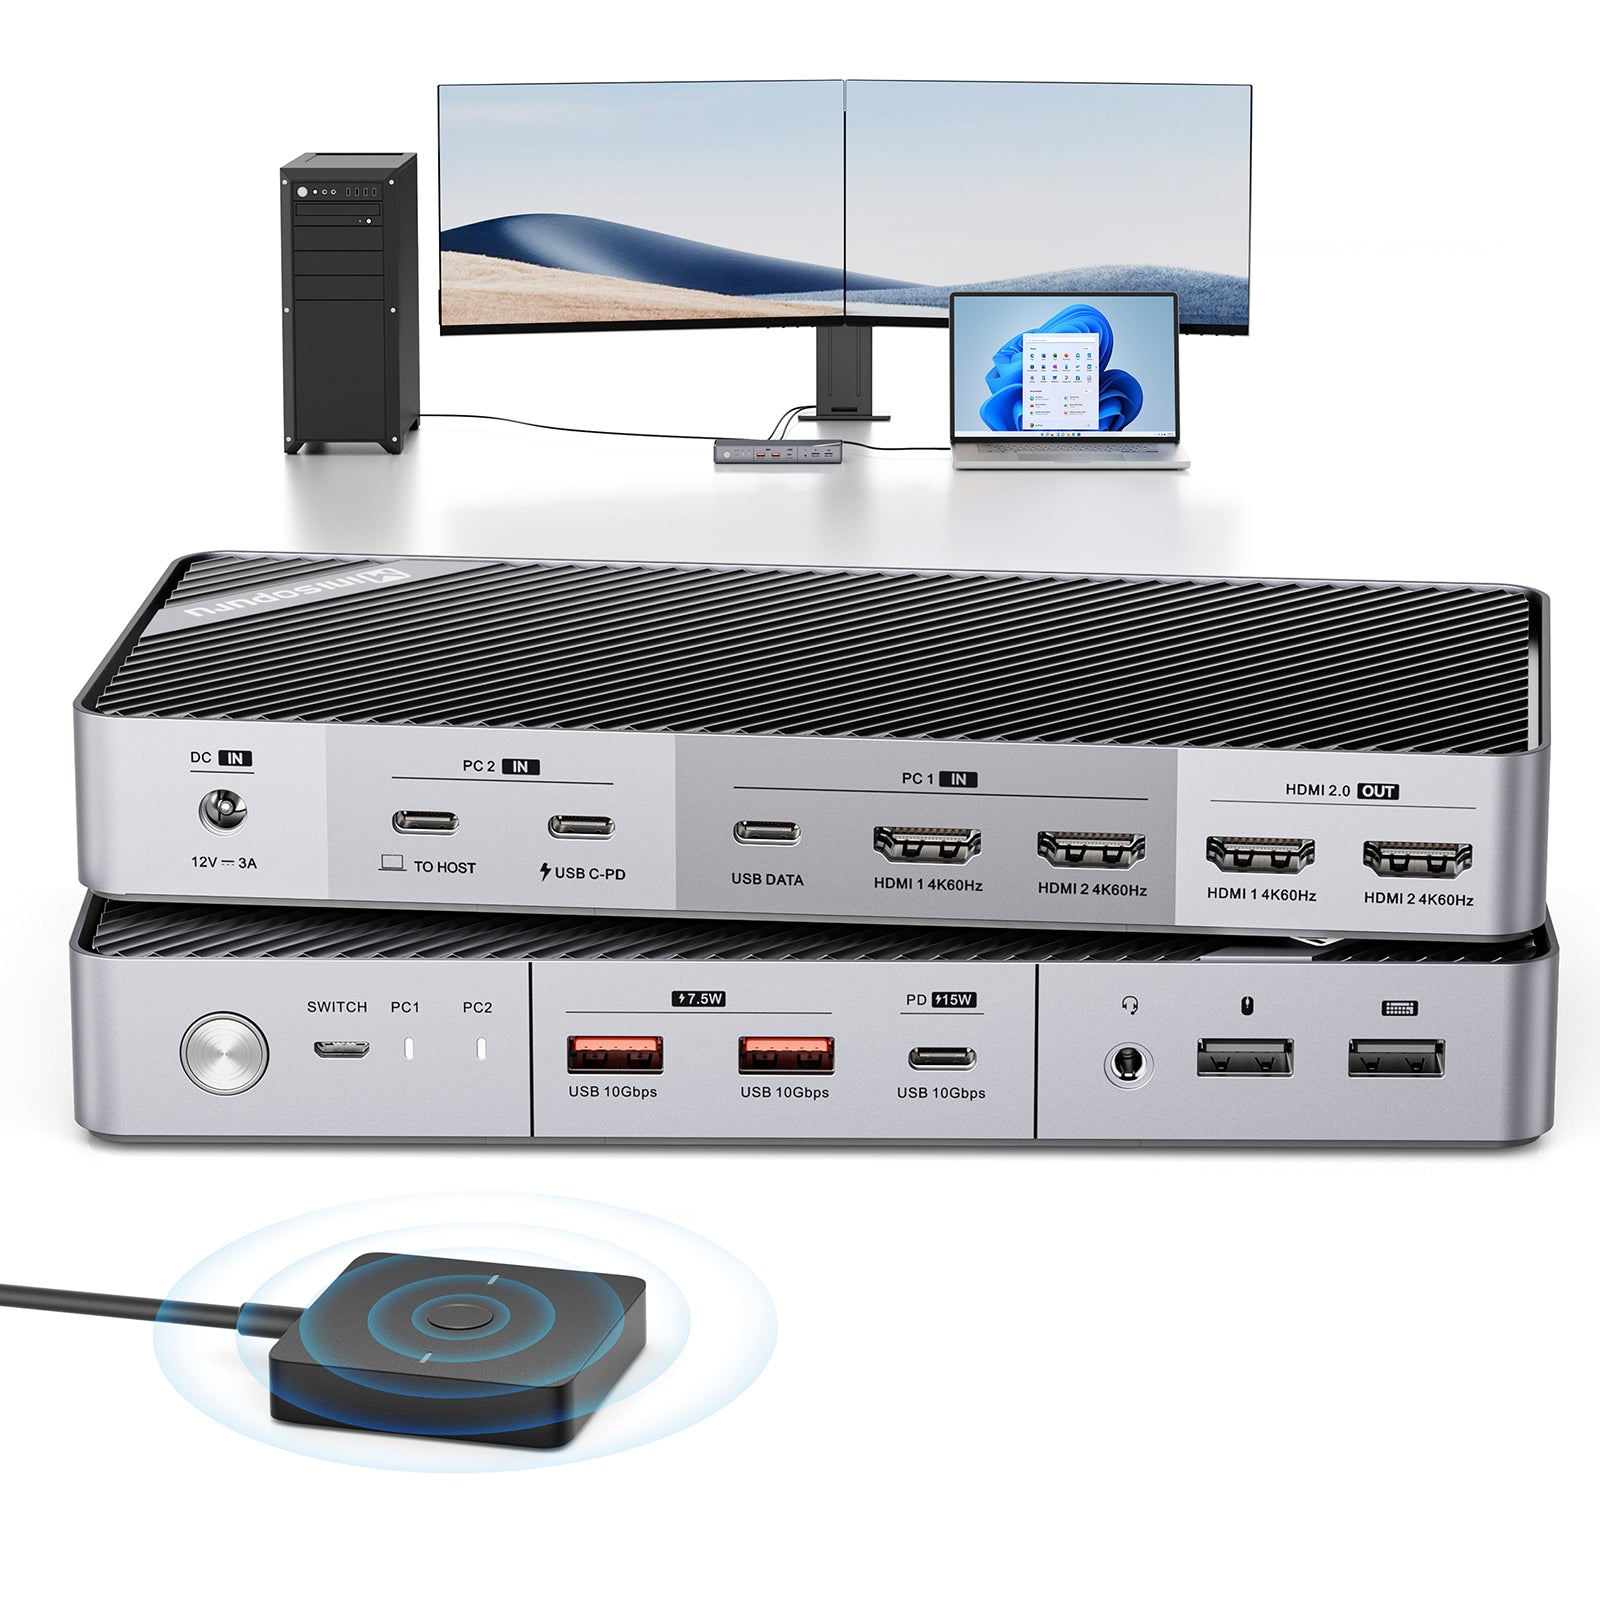
USB-C or Thunderbolt dock
A dock can act like a smart hub for the laptop. One cable gives you video, USB, audio, Ethernet, and charging. Plug the desktop into the dock’s spare inputs or into the monitors’ other inputs.
Thunderbolt 4 and USB4 docks are very flexible. Many handle dual 4K 60 or even a single 4K 120 with DSC. Check power delivery if you need to charge a laptop at 65–100 W.
Use monitors with multiple inputs
Most modern displays have more than one input. For example, HDMI for the desktop and DisplayPort or USB-C for the laptop. You switch with the monitor’s input button or auto-scan.
This is the cheapest path. Pair it with a USB switch or a multi-device keyboard and mouse for a clean swap.
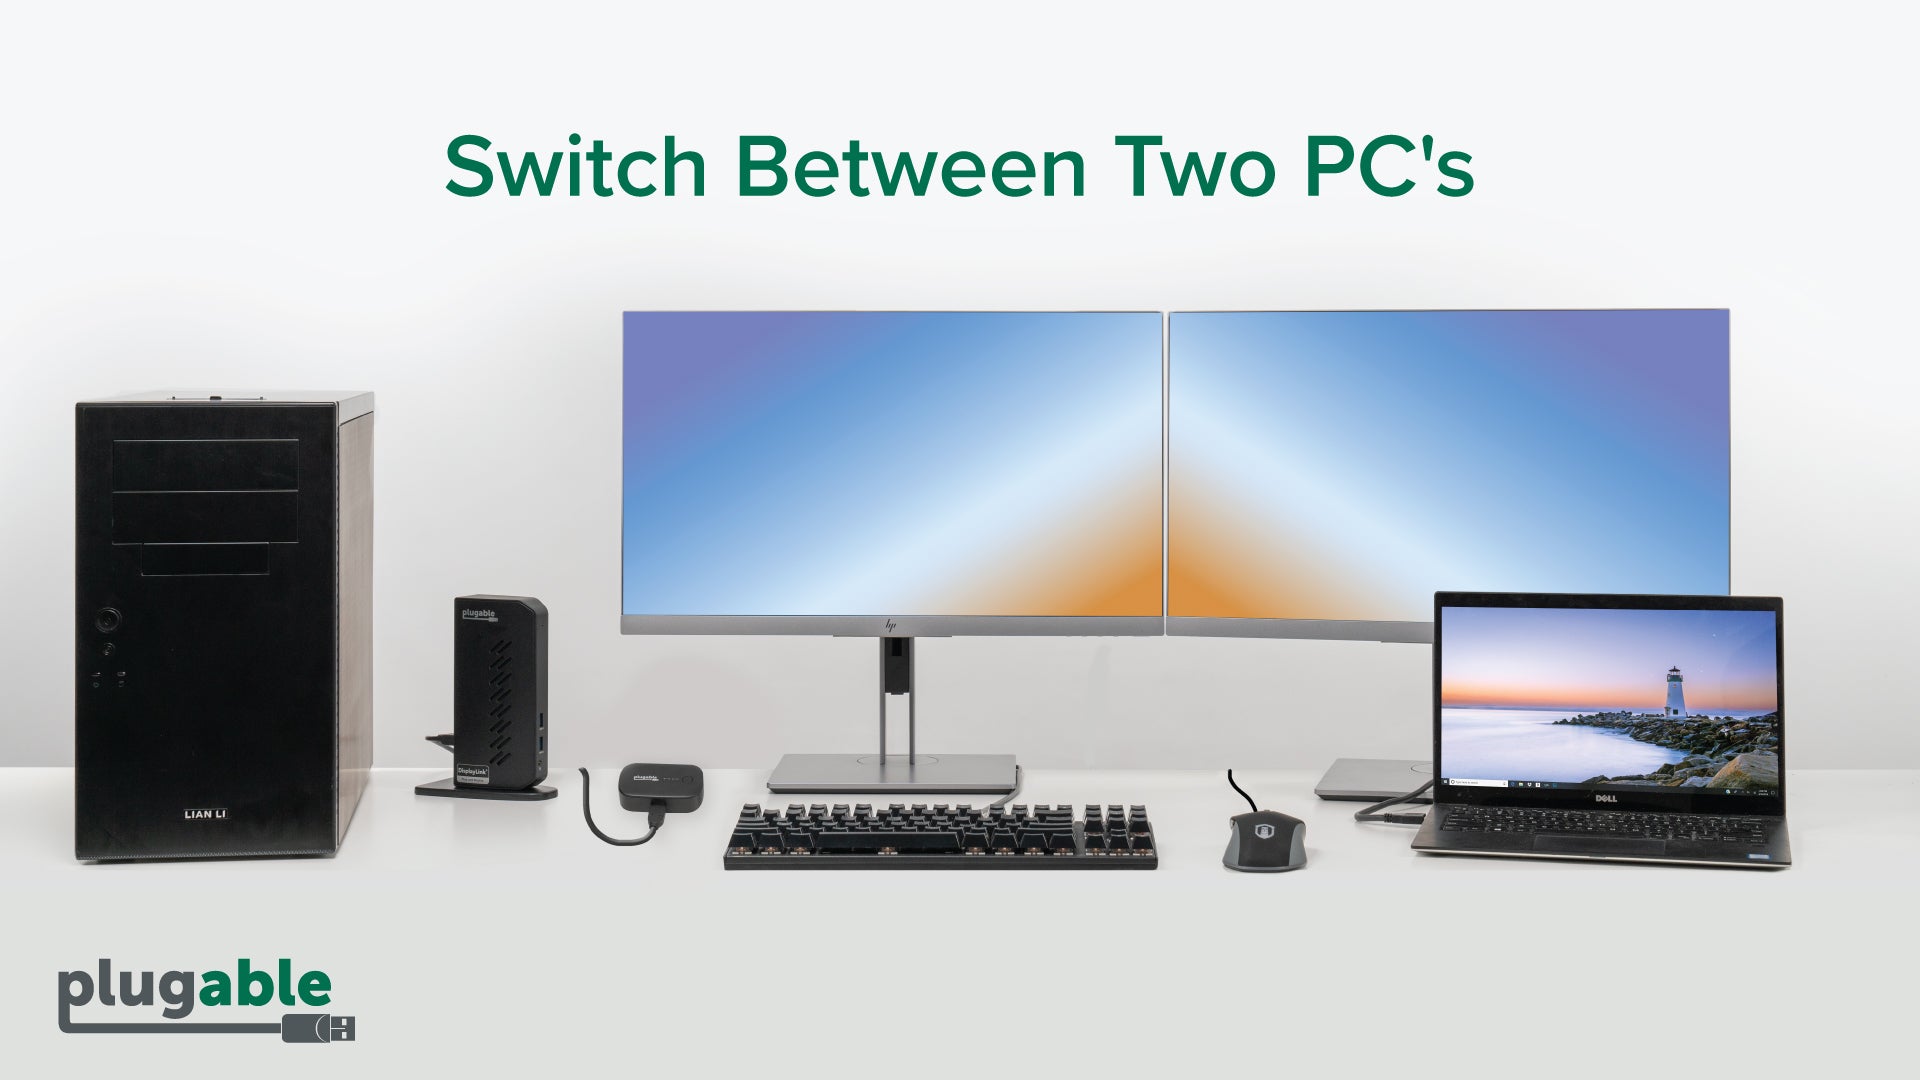
USB switch or multi-device peripherals
A simple USB 3.0 switch shares your keyboard, mouse, webcam, and mic. One button moves all USB devices between machines. Latency is very low and setup is easy.
Or use a keyboard and mouse that support three devices. You press a device button to switch. Some brands also let you flow the cursor across machines over the network.
Software KVM (no video switching)
Apps move keyboard and mouse over the network between devices. You slide the cursor across screens like one big desktop. It’s fast and wireless, but the displays stay on their own devices.
Popular options work on Windows, macOS, and Linux. This is great if your monitors already handle input switching. It is also handy when hardware KVMs are too pricey.

Step-by-step setups
This section gives you clear steps. Pick the method that matches your gear and follow along. Each path solves how to switch between desktop and laptop with monitors in a clean way.
Setup with a Thunderbolt/USB-C dock
- Connect your monitor(s) to the dock using DisplayPort or HDMI cables.
- Plug your keyboard, mouse, webcam, and mic into the dock’s USB ports.
- Connect wired Ethernet to the dock if you use it.
- Run one USB-C/Thunderbolt cable from the dock to your laptop.
- Connect your desktop to spare monitor inputs or to a second dock port if supported.
- Switch by pressing each monitor’s input button and, if needed, a USB switch button.
Tip: Make sure the dock’s power delivery meets your laptop’s wattage. Many thin laptops want 65 W. Some workstations need 90–100 W.
Setup with a hardware KVM switch
- Connect your monitor cable(s) to the KVM’s output.
- Connect your keyboard, mouse, and USB devices to the KVM’s USB ports.
- Plug the desktop’s video and USB into KVM input A.
- Plug the laptop’s video and USB into KVM input B.
- Use the KVM’s button or hotkey to swap both video and USB at once.
Tip: Match the KVM to your display needs. If you run a 4K 144 Hz or HDR setup, buy a KVM that lists those modes.
Setup using monitor inputs + USB switch
- Connect the desktop to HDMI 1 on each monitor.
- Connect the laptop to DisplayPort or USB-C on each monitor.
- Plug your keyboard, mouse, and webcam into a USB 3.0 switch.
- Connect the USB switch’s outputs to both computers.
- Switch the monitor input and press the USB switch button to move peripherals.
Tip: Label inputs on your monitors to avoid confusion. Many monitors let you rename inputs.
Setup with a software KVM
- Install the app on both machines.
- Put both devices on the same network, wired if possible.
- Set which screen is left or right.
- Share the keyboard and mouse from your main machine.
- Switch monitor inputs if you want to see the laptop screen on a shared display.
Tip: Use wired Ethernet for smoother cursor flow and file copy. Some apps allow clipboard sync and file drag-and-drop.

Display and cable basics that matter
Display and cable standards set hard limits. This is key when learning how to switch between desktop and laptop with monitors. Bandwidth, compression, and feature support decide what works.
HDMI vs DisplayPort vs USB-C
- HDMI 2.0 handles 4K 60. HDMI 2.1 adds 4K 120 and VRR on some devices.
- DisplayPort 1.4 handles 4K 120 with DSC and high refresh ultrawide. DisplayPort 2.1 goes even higher.
- USB-C with DisplayPort Alt Mode depends on the laptop’s port. Not all USB-C ports carry video.
Refresh rate, resolution, DSC, and MST
- High refresh rates need more bandwidth. Check both GPU and cable specs.
- DSC is a form of display compression. It enables 4K 120 or 4K 144 on some links.
- MST can split one DisplayPort link into two monitors on Windows. macOS support is limited.
EDID, HDR, and scaling
- EDID is how devices learn monitor abilities. Some KVMs emulate EDID to prevent re-detect flicker.
- HDR needs full 10-bit paths and correct color settings.
- Scaling changes how sharp text looks. Keep scaling the same on both devices when possible.
Source: benq.com

Audio, webcam, and mic switching
Audio and cameras often get missed. Plan them with the same care as video. This is a key part of how to switch between desktop and laptop with monitors.
- If you use a dock or KVM, plug your headset, mic, and webcam into it. They follow when you switch.
- If you use monitor inputs, add a USB switch for the mic and camera.
- For audio out from the monitor, select the monitor as the audio device on each computer.
- Use a hardware mute button on your mic for privacy.

Source: youtube.com
Network, storage, and power tips
A wired network improves calls and remote work. A shared drive simplifies files. Power keeps your laptop charged and ready.
- Use Ethernet on the dock or KVM for lower latency.
- Set up a shared NAS or a cloud drive to keep files in sync.
- Make sure the dock gives enough power delivery. Many pro laptops want 90 W or more.
- If you game on the desktop, keep its GPU on the highest bandwidth output, like DisplayPort 1.4 or HDMI 2.1.
Source: plugable.com
Troubleshooting and quick fixes
Switching should be smooth. If it is not, try these fixes. This section can save you hours.
- If screens go black when switching, turn on EDID emulation in the KVM or enable Always On USB in BIOS.
- If 4K 120 drops to 60, try a certified cable, shorter runs, or a different port.
- If the laptop does not charge, check power delivery rating and use the original charger on the dock.
- If audio switches to the wrong device, set a default device per app and per machine.
- If the cursor stutters with software KVM, use wired Ethernet and lower polling rate on the mouse.

Source: youtube.com
Buying guide and budget builds
There is no one right rig. Your best setup for how to switch between desktop and laptop with monitors depends on displays and tasks.
- Entry-level: Use monitor input buttons plus a USB 3.0 switch. Cheap and reliable.
- Mid-range: USB-C dock for the laptop, desktop on other inputs, plus a USB switch. One-cable laptop life.
- High-end: True 4K 144 Hz KVM or Thunderbolt 4 dock with EDID and high power delivery. One-tap swap.
- For creators: DisplayPort-first path, DSC support, color-accurate monitors, and a KVM with EDID.
- For gamers: GPU to monitor via the best port. Use a separate USB switch for low-latency peripherals.

Source: avicotech.com
Real-world examples and pro tips
At my desk, I switch a workstation desktop and a MacBook with two 27-inch 4K monitors. I use a Thunderbolt 4 dock, a short DisplayPort cable, and a USB 3.0 switch for the webcam and mic. My laptop gets 90 W charging and wakes in clamshell mode each morning.
Lessons learned that improve how to switch between desktop and laptop with monitors:
- Buy shorter, certified cables. Long runs cause random drops.
- Label inputs on each monitor. It saves time under pressure.
- Turn off auto input on monitors if they keep jumping to the wrong source.
- Keep a small HDMI-to-DisplayPort adapter on hand for guests.
- Map KVM hotkeys to a macro key for a one-tap swap.
People also ask, quick answers:
- Can I run dual monitors on one USB-C cable? Yes, if your laptop and dock support MST or dual display via Thunderbolt.
- Will a KVM add input lag? A good digital KVM adds very little. Cheap hubs can add jitter.
- Can I keep audio on speakers while switching video? Yes. Set a fixed audio device in your OS and use a separate USB path for the DAC.
Frequently Asked Questions of how to switch between desktop and laptop with monitors
What is the easiest way to switch between a desktop and a laptop?
Use your monitor’s input button for video and a USB switch for keyboard and mouse. It is cheap, fast, and works with most setups.
Do I need a KVM to switch with two monitors?
Not always. Many users pair dual-input monitors with a USB switch and get a smooth two-screen swap.
Will a USB-C dock work with my laptop?
Check if your USB-C port supports DisplayPort Alt Mode and power delivery. If it supports Thunderbolt, most Thunderbolt 3/4 docks will work even better.
Can I get 4K 144 Hz through a KVM?
Only with a KVM that lists 4K 144 Hz or DisplayPort 1.4 with DSC. Many KVMs cap at 4K 60 Hz, so confirm before you buy.
How do I switch audio and webcam with the video?
Plug them into the same KVM or USB switch you use for the keyboard and mouse. They will follow the same switch.
Why does my laptop not charge through the dock?
The dock may not offer enough power delivery. Use a dock with higher wattage or add the laptop’s own charger.
Can software KVM replace a hardware KVM?
It can replace USB control but not video switching. Combine software KVM with monitor input switching for a low-cost setup.
Conclusion
You have many clean ways to handle how to switch between desktop and laptop with monitors. A dock gives you one-cable laptop life. A KVM gives one-touch swaps. Monitor inputs plus a USB switch is the budget hero. Pick the path that matches your displays, ports, and refresh rate needs.
Start small this week. Label your inputs, add a USB switch, and map a hotkey. When you are ready, step up to a dock or a KVM that fits your goals. Want more desk guides like this? Subscribe, share your setup in the comments, and ask your next question.